
Wednesday, June 30, 2010

Tuesday, June 29, 2010
The end of Course 1
After 4 weeks, it's the end of Course 1. In the final lesson, we were to bring a plain frosted cake and 10 Wilton roses to class to decorate our "graduation" cake based on the course book.
Here are some photos of the cakes we did for our graduation:


 I just love the mix of that white and mauve rose.
This particular lady is very good in mixing colours.
I should try it some time..
 Mine.
Simple & fuss-free, just the way i like it.. for the obvious reasons heheh..
Whatever works for you, right?
 Our instructor Joanne Fam aka Jo with yours truly.
Jo is a Chemical Process Engineer turned Cake Decorating Instructor.
She's also the founder of the Malaysian Cake Decorator's Club.
Very cool lady ;)
Oh, and she made a birthday cake for Kelly Clarkson's 28th birthday earlier this year too!
Visit her site here.
Here are some photos of the cakes we did for our graduation:


 I just love the mix of that white and mauve rose.
This particular lady is very good in mixing colours.
I should try it some time..
 Mine.
Simple & fuss-free, just the way i like it.. for the obvious reasons heheh..
Whatever works for you, right?
 Our instructor Joanne Fam aka Jo with yours truly.
Jo is a Chemical Process Engineer turned Cake Decorating Instructor.
She's also the founder of the Malaysian Cake Decorator's Club.
Very cool lady ;)
Oh, and she made a birthday cake for Kelly Clarkson's 28th birthday earlier this year too!
Visit her site here.
Tuesday, June 8, 2010
Line impression
Here's a tip on how to get line impression on your fondant cake at a fraction of the cost.
As an alternative to the Line impression mat like the one here,
 Impression Mats
(cost about RM35 each)
Very cost effective, wouldn't you say so? Plus, it comes in handy when i need it for a tart gulung. Ok, let me rephrase that, that's IF i ever need it for a tart gulung ;p
p/s. just found out that it only costs RM4.80 at Tesco! Ciss.. daylight robbery!!
As an alternative to the Line impression mat like the one here,
 Impression Mats
(cost about RM35 each)
... use this:
 the roller for rolled pineapple tart (tat gulung)
(bought at RM6 which u can get from almost any baking shop)
 the roller for rolled pineapple tart (tat gulung)
(bought at RM6 which u can get from almost any baking shop)
Very cost effective, wouldn't you say so? Plus, it comes in handy when i need it for a tart gulung. Ok, let me rephrase that, that's IF i ever need it for a tart gulung ;p
p/s. just found out that it only costs RM4.80 at Tesco! Ciss.. daylight robbery!!
My 1st fondant cake for Zahra's 1st (animal themed) birthday

 My ultimate project to date. My cousin's daughter turned 1, 2 weeks ago and i was given the responsibility to come up with an animal themed cake.
The cake is covered with fondant and decorated with gumpaste animal figurines while the animal faces for the cupcakes are made of buttercream. I was going to make the cake yellow, but since the cousin wanted to make sure it's girlish, i went for the utmost girlish colour, a pastel pink instead. I was also hoping to find a Giraffe print wrapper for the tiers but had to settle for stripes as i couldn't find any.
I was lucky enough that Animal figurine cupcakes course was included in Cake Connection's schedule that month! We did, i mean we were supposed to make 6 figurines in class but i came home with 2 invisible ones. Paige Fong was the talented instructor for the class. Her immaculate attention to detail very much impressed me and she's just the kind of instructor anyone could have hoped for. She even helped me with questions in my attempt at home (to make the 2 animals i didn't have time for in class) via email. Thanks, Paige!
(Check out her impressive work of art here).
And thanks to my current instructor, Joanne Fam who advised me due to my ordeal with the sticky fondant. You're a life saver!! :D (it's a lot easier to work with fondant in class as the room is air-conditioned..).
Meanwhile, here are 2 cupcakes i did in class.. the other 2 was taken before i had the chance to snap them.

Anyways, Happy 1st Birthday, dear Zahra!
Tuesday, May 25, 2010
Bake-Even Strips
If you read further on my entry about my nephew's birthday cake, you would know by now that my oven does not work properly since then. Baking cupcakes is fine probably because they are smaller in size thus, it doesn't really leave a significant impact. But if i were to bake larger cakes, they wouldn't rise accordingly even after i turn the pan the other way round after half baking time. They still result in my cake being slightly lopsided if not at all. I was already considering to get a new oven, planning on building a cabinet just for this purpose and to stuff in my baking apparatus and what not until i discovered the 'Bake-Even Strip'. I tried it for the first time to bake for the PIBG cake and hey, it worked like a charm! (though i still have to turn the pan this time but still it helps).
They are sold in a pack of 2s and 4s. The price of 2 strips is about RM45 and RM90+ for the 4s. I'll settle for this at the moment as opposed to having to spend RM5000 for a new oven and a built in cabinet :)

 (please don't be alarmed by the colour of the cakes in the photos above. The strip does not alter the colour of your cake. The one in the oven is a buttercake while the one that is done is a chocolate cake. I just forgot to take a before photo of the choc cake :) )
They are sold in a pack of 2s and 4s. The price of 2 strips is about RM45 and RM90+ for the 4s. I'll settle for this at the moment as opposed to having to spend RM5000 for a new oven and a built in cabinet :)

 (please don't be alarmed by the colour of the cakes in the photos above. The strip does not alter the colour of your cake. The one in the oven is a buttercake while the one that is done is a chocolate cake. I just forgot to take a before photo of the choc cake :) )
Monday, May 24, 2010
Happy cake for a happy person
We were told to bring a frosted 8" cake to class for decorating in our second lesson of Course 1. We learned the techniques for printing and writing, piping stars fill-in and borders and also pattern transfer.
I know i've done this several times before, but my hands were still shaking during the process. When doing this, PRESSURE CONTROL is key! I didn't have much time to do any writing or printing in class, so during dinner i asked my brothers if they knew anyone's celebrating their birthday the next day, then i can personalise the cake. And the lucky (or unlucky :p) person is...
 The Happy Arif
 The Arif Happy cake.
I thought i'd inject some fun to it by drawing a stick man.
(I later received a text from the celebrated, personally thanking me and said that he was indeed very happy. How nice :)).
I know i've done this several times before, but my hands were still shaking during the process. When doing this, PRESSURE CONTROL is key! I didn't have much time to do any writing or printing in class, so during dinner i asked my brothers if they knew anyone's celebrating their birthday the next day, then i can personalise the cake. And the lucky (or unlucky :p) person is...
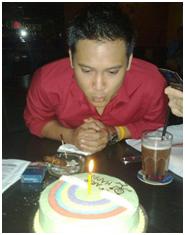 The Happy Arif
 The Arif Happy cake.
I thought i'd inject some fun to it by drawing a stick man.
(I later received a text from the celebrated, personally thanking me and said that he was indeed very happy. How nice :)).
** One good tip i learned is to add some piping gel into thin consistency buttercream for smoother writing and printing ;)
Saturday, May 22, 2010
Butterless buttercream?? Hmm...
The first lesson at the Wilton Course 1 in ICCA was more on the theoretical side. It was mostly on the introduction of the tools that are used in cake decorating and how to use them, which includes how to fold a parchment paper (this is more ideal for melted chocolate so i shall try this for the writing on my double double disaster cupcakes!) and also how to make the decorators' icing aka buttercream as well as 3 different consistencies for different techniques.
The decorator's buttercream i learned here at the first lesson is something i find very interesting. First of all, it has NO BUTTER! I have been to several classes and have had several different views from different people in producing the buttercream but none that has absolutely no butter in it. From what i know, shortening are added to better hold the shapes of your designs apart from adding the meringue powder as explained in one of my earlier posts. Some even prefer to use 100% butter because it has more flavour.
But i have to say, this butterless buttercream is THE BEST so far! I find it less sweet even with the same amount of sugar i normally use in my buttercream (with butter) and is creamier too! And it is especially ideal if you want to produce super white frosting for wedding or christmas cakes (for the snow etc.). Also, if you want to get certain colours right, this is the kind of buttercream you would want to use.
Click here for the recipe.
 The super white buttercream.
Then again, it really depends on your preference. I'd go back to half cup of butter (instead of 1 whole cup of shortening) just to achieve the ivory colour. Otherwise, 100% shortening is fine by me. It's cost efficient too! ;)
The decorator's buttercream i learned here at the first lesson is something i find very interesting. First of all, it has NO BUTTER! I have been to several classes and have had several different views from different people in producing the buttercream but none that has absolutely no butter in it. From what i know, shortening are added to better hold the shapes of your designs apart from adding the meringue powder as explained in one of my earlier posts. Some even prefer to use 100% butter because it has more flavour.
But i have to say, this butterless buttercream is THE BEST so far! I find it less sweet even with the same amount of sugar i normally use in my buttercream (with butter) and is creamier too! And it is especially ideal if you want to produce super white frosting for wedding or christmas cakes (for the snow etc.). Also, if you want to get certain colours right, this is the kind of buttercream you would want to use.
Click here for the recipe.
 The super white buttercream.
Then again, it really depends on your preference. I'd go back to half cup of butter (instead of 1 whole cup of shortening) just to achieve the ivory colour. Otherwise, 100% shortening is fine by me. It's cost efficient too! ;)
Subscribe to:
Posts (Atom)